1. 파일질라(FTP) 설정하기
파일질라를 다운로드 후 설치를 합니다.
https://filezilla-project.org/download.php?type=client
파일질라를 실행 후 컨트롤+S 를 눌려줍니다.
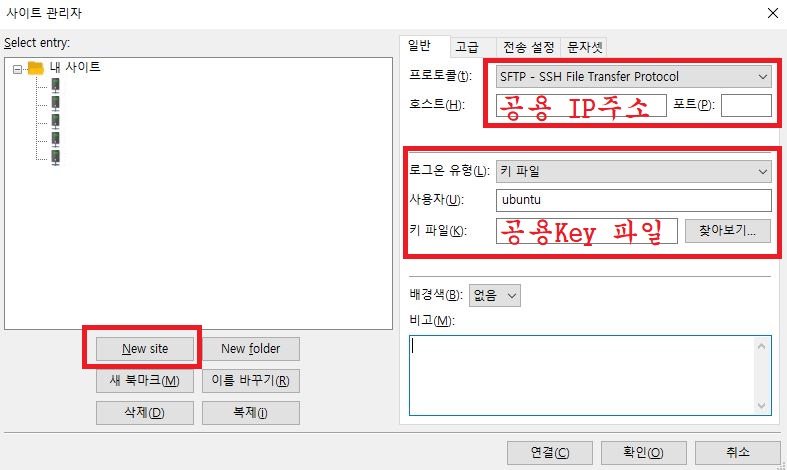
New site를 클릭 후 생성합니다.
프로토콜: SFTP - SSH File Transfer Protocol
호스트: 공용 IP주소
로그온 유형: 키 파일
사용자: ubuntu
키 파일: 공용 Key
설정 후 연결을 눌리면 접속이 됩니다.
2. EditPlus로 default 수정
EditPlus로 etc/nginx/sites-available/default 파일을 열기 합니다.
client_max_body_size 32m;
ssl_certificate /etc/letsencrypt/live/도메인.com/fullchain.pem;
ssl_certificate_key /etc/letsencrypt/live/도메인.com/privkey.pem;
ssl_trusted_certificate /etc/letsencrypt/live/도메인.com/fullchain.pem;
include /etc/nginx/snippets/ssl.conf;
include snippets/rhymix.conf;
server_name 도메인.com; 아래
client_max_body_size 32m; 를 추가합니다.
include /etc/nginx/snippets/ssl.conf; 아래
include snippets/rhymix.conf; 를 추가합니다.
server {
listen 443 ssl http2 default_server;
listen [::]:443 ssl http2 default_server;
server_name 도메인.com;
ssl_certificate /etc/letsencrypt/live/도메인.com/fullchain.pem;
ssl_certificate_key /etc/letsencrypt/live/도메인.com/privkey.pem;
ssl_trusted_certificate /etc/letsencrypt/live/도메인.com/fullchain.pem;
include /etc/nginx/snippets/ssl.conf;
root /var/www/html;
index index.php index.html index.htm index.nginx-debian.html;
location / {
try_files $uri $uri/ =404;
if (!-e $request_filename) {
rewrite ^.*$ /index.php last;
}
}
location ~ \.php$ {
include snippets/fastcgi-php.conf;
fastcgi_pass unix:/run/php/php7.4-fpm.sock;
fastcgi_param SCRIPT_FILENAME $document_root$fastcgi_script_name;
include fastcgi_params;
fastcgi_read_timeout 300;
}
location ~ /\.ht {
deny all;
}
}
# HTTPS www. server configuration
server {
listen 443 ssl http2;
listen [::]:443 ssl http2;
server_name www.도메인.com;
ssl_certificate /etc/letsencrypt/live/도메인.com/fullchain.pem;
ssl_certificate_key /etc/letsencrypt/live/도메인.com/privkey.pem;
ssl_trusted_certificate /etc/letsencrypt/live/도메인.com/fullchain.pem;
include /etc/nginx/snippets/ssl.conf;
location / {
return 301 https://도메인.com$request_uri;
}
}
# Default server configuration
server {
listen 80;
listen [::]:80 default_server;
server_name 도메인.com;
include /etc/nginx/snippets/letsencrypt.conf;
location / {
return 301 https://도메인.com$request_uri;
}
}
# HTTP - CNAME Connect www.도메인.com to 도메인.com
server {
listen 80;
listen [::]:80;
server_name www.도메인.com;
include /etc/nginx/snippets/letsencrypt.conf;
location / {
return 301 https://www.도메인.com$request_uri;
}
}
location / {
try_files $uri $uri/ =404;
if (!-e $request_filename) {
rewrite ^.*$ /index.php last;
}
}
location / {
}
15~20번째줄, 46, 48, 60, 62, 73, 75 번째줄에 있는 내용을 모두 삭제 합니다.
라이믹스 2.x 버전부터는 rewrite 규칙에 location / { try_files ... } 블럭이 포함되어 있으므로 사이트 설정에 동일한 블럭을 추가하면 오류가 발생합니다.
SSH에서 위 명령어를 입력합니다.
Nginx를 재시작합니다.
var/www/html 폴더안에 index.php 를 포함한 모든 파일을 삭제합니다. (FTP로 접속해서 삭제하면 됨)
git clone https://github.com/rhymix/rhymix.git ./
git으로 라이믹스를 설치합니다.
(html 폴더가 비어있지 않으면 설치가 안됩니다.)
sudo chmod 777 files
files 폴더를 만들고 퍼미션을 777로 변경합니다.
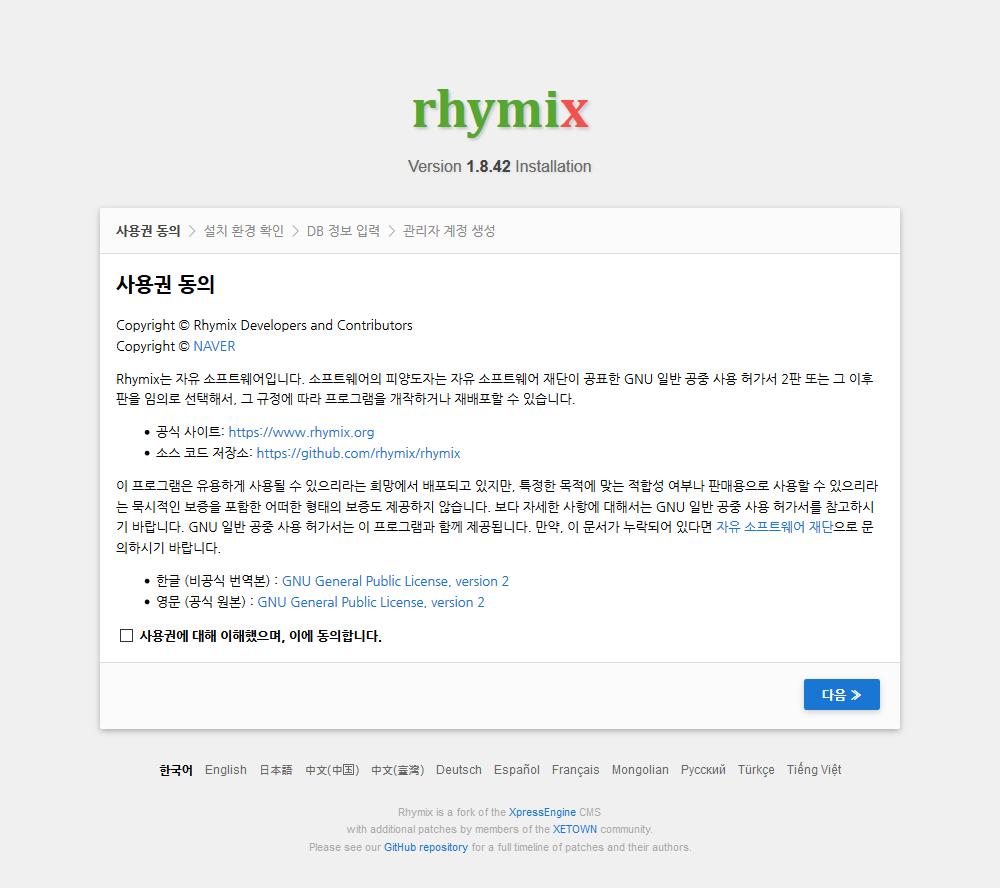
업로드 완료 후 도메인으로 접속하면 설치화면이 나옵니다.
동의란에 체크 후 다음을 클릭 합니다.
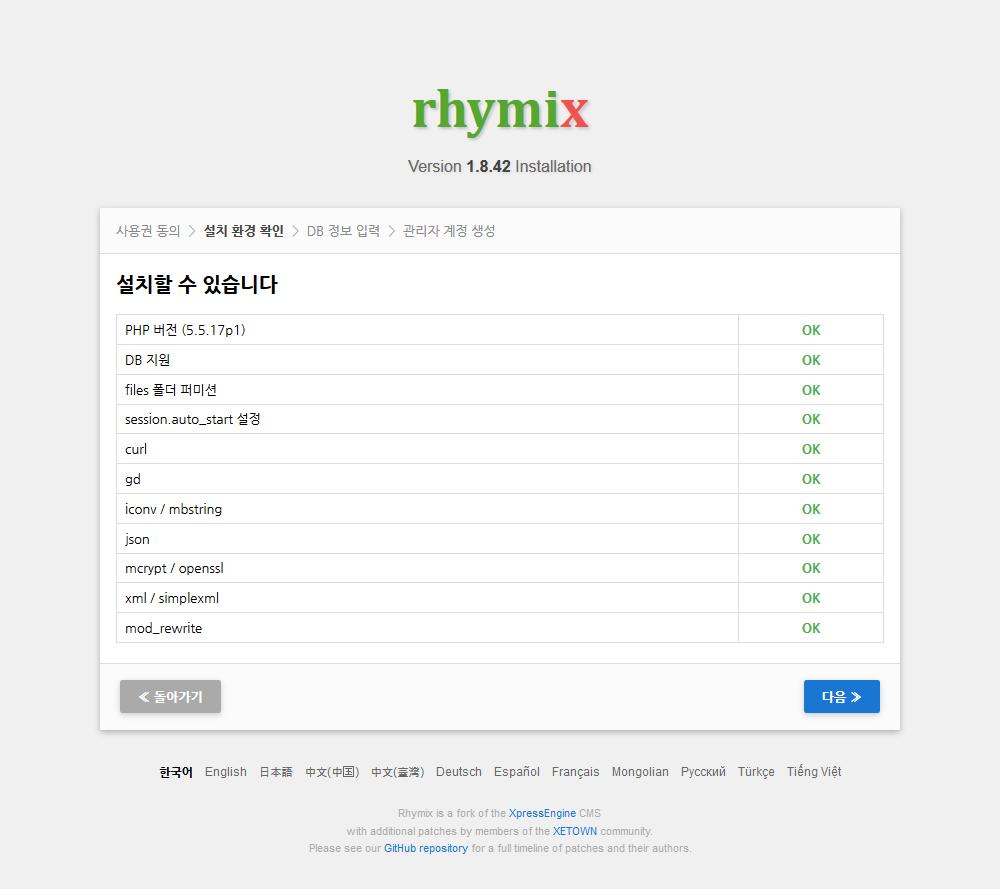
전체 OK가 뜨면 다음을 클릭 합니다.
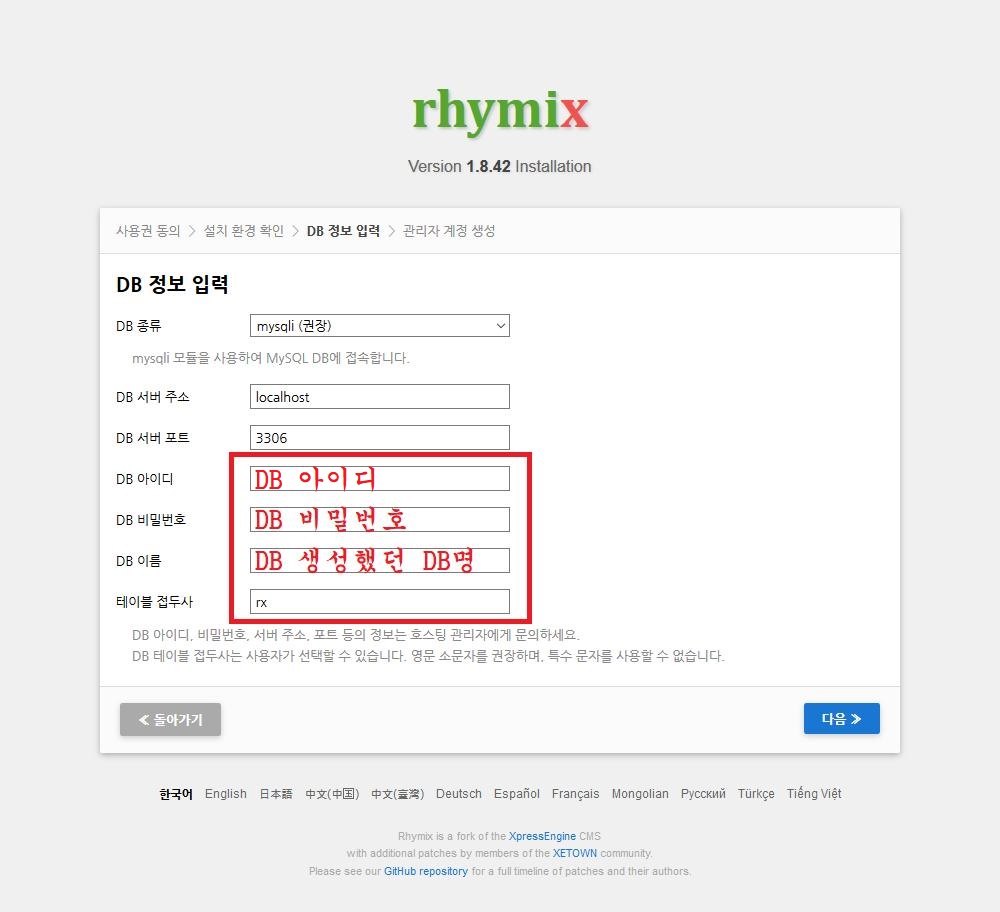
DB 아이디: DB 아이디
DB 비밀번호: DB 비밀번호
DB 이름: DB생성 했던 DB명
테이블 접두사: rx
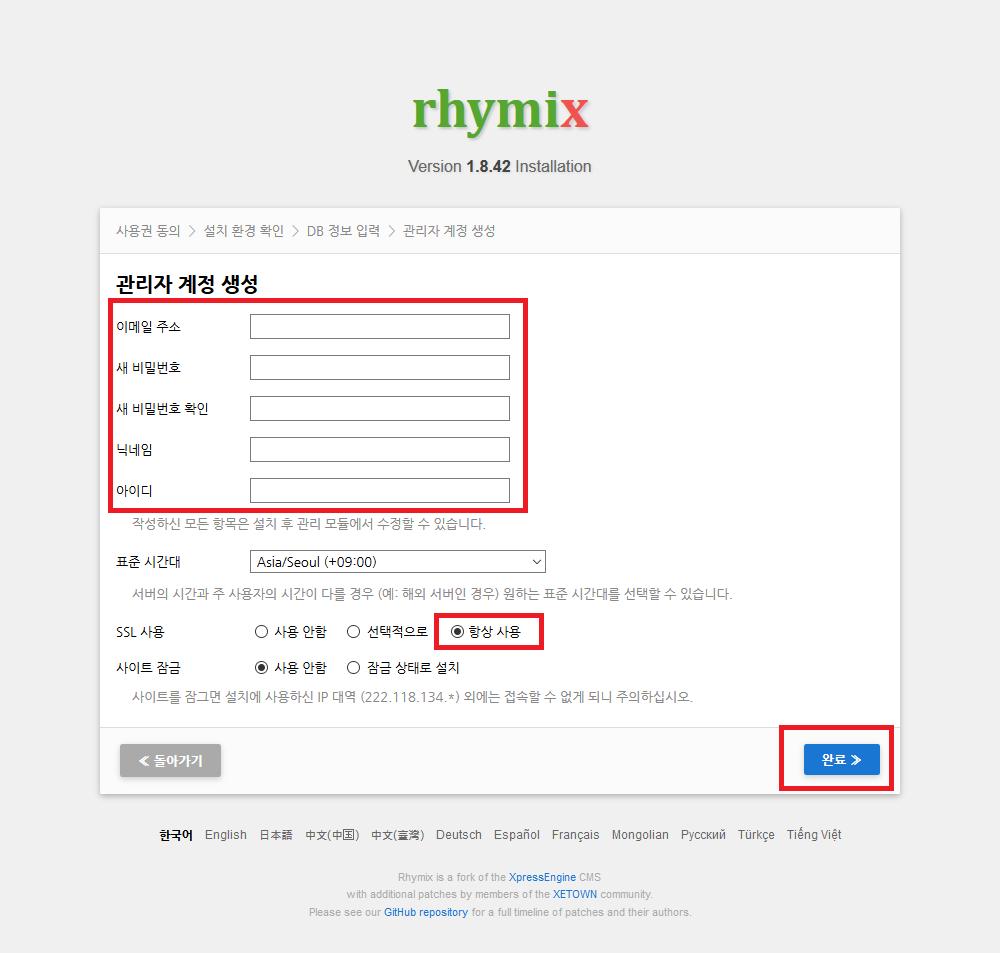
관리자 아이디 생성 후 완료를 클릭 합니다.
(우린 SSL을 적용했기 때문에 SSL 사용에 항상 사용으로 체크 합니다.)

설치가 완료 되었습니다.


