1. Let's Encrypt SSL의 자동 인증서 관리 환경 구성
sudo touch /etc/nginx/snippets/letsencrypt.conf
sudo chown root:ubuntu /etc/nginx/snippets/letsencrypt.conf
sudo chmod 775 /etc/nginx/snippets/letsencrypt.conf
명령어를 차례로 입력합니다.
nano 에디터로 letsencrypt.conf 파일을 엽니다.
default_type "text/plain";
root /var/www/letsencrypt;
}
위 코드를 복사하여 빈 화면에 붙여넣기 합니다. (붙여넣기는 마우스 우클릭)
컨트롤+X 눌리고 Y 눌리고 ENTER를 눌려 저장합니다.
2. Nginx 라우팅 설정에 letsencrypt.conf 내용 추가
EditPlus로 /etc/nginx/sites-available/default 파일을 열기 합니다.
server {
listen 80 default_server;
listen [::]:80 default_server;
root /var/www/html;
index index.php index.html index.htm index.nginx-debian.html;
server_name 도메인.com;
include /etc/nginx/snippets/letsencrypt.conf;
location / {
try_files $uri $uri/ =404;
if (!-e $request_filename) {
rewrite ^.*$ /index.php last;
}
}
location ~ \.php$ {
include snippets/fastcgi-php.conf;
fastcgi_pass unix:/run/php/php7.4-fpm.sock;
fastcgi_param SCRIPT_FILENAME $document_root$fastcgi_script_name;
include fastcgi_params;
fastcgi_read_timeout 300;
}
location ~ /\.ht {
deny all;
}
}
### HTTP (CNAME 연결 www.도메인.com to 도메인.com ) ###
server {
listen 80;
listen [::]:80;
server_name www.도메인.com;
include /etc/nginx/snippets/letsencrypt.conf;
location / {
return 301 http://도메인.com$request_uri; ### http://도메인.com 로 리다이렉팅
}
}
server_name 도메인명 아래 include /etc/nginx/snippets/letsencrypt.conf; 를 추가 후 저장합니다. (10번째, 37번째 라인)
sudo service nginx restart
차례로 입력합니다.
3. Let's Encrypt SSL 인증서 다운로드
chmod a+x certbot-auto
export LC_ALL="C"
차례로 입력합니다.
재부팅을 합니다.
업데이트 후 certbot을 설치합니다.
파이썬과 certbot을 설치합니다.
인증서를 설치 합니다.
명령어를 입력합니다.
인증서가 제대로 저장되었는지 확인 합니다.
drwx------ 3 root root 4096 Sep 21 13:09 ..
-rw-r--r-- 1 root root 692 Sep 21 13:09 README
lrwxrwxrwx 1 root root 38 Sep 21 13:09 cert.pem -> ../../archive/도메인.com/cert1.pem
lrwxrwxrwx 1 root root 39 Sep 21 13:09 chain.pem -> ../../archive/도메인.com/chain1.pem
lrwxrwxrwx 1 root root 43 Sep 21 13:09 fullchain.pem -> ../../archive/도메인.com/fullchain1.pem
lrwxrwxrwx 1 root root 41 Sep 21 13:09 privkey.pem -> ../../archive/도메인.com/privkey1.pem
위와 같이 나온다면 SSL 키가 정상적으로 저장된 것입니다.
4. Nginx에 SSL 인증서 적용하기
OpenSSL을 사용하여 dhparam 암호화 합니다.
20분가량 소요됩니다.
sudo chmod 777 /etc/nginx/snippets/ssl.conf
차례로 입력합니다.
nano 에디터로 ssl.conf 파일을 엽니다.
ssl_session_cache shared:SSL:50m;
ssl_session_tickets off;
ssl_protocols TLSv1 TLSv1.1 TLSv1.2;
ssl_dhparam /etc/nginx/dhparam.pem;
ssl_ciphers ECDHE-RSA-AES256-GCM-SHA512:DHE-RSA-AES256-GCM-SHA512:ECDHE-RSA-AES256-GCM-SHA384:DHE-RSA-AES256-GCM-SHA384:ECDHE-RSA-AES256-SHA384;
ssl_ecdh_curve secp384r1;
ssl_prefer_server_ciphers on;
ssl_stapling on;
ssl_stapling_verify on;
resolver 8.8.8.8 8.8.4.4;
add_header Strict-Transport-Security "max-age=15768000; includeSubdomains; preload";
add_header X-Content-Type-Options nosniff;
add_header X-Frame-Options "SAMEORIGIN";
위 코드를 빈 화면에 복사하여 붙여넣기 합니다.
컨트롤+X 눌리고 Y 눌리고 ENTER를 칩니다.
수정할 수 없도록 권한을 변경합니다.
EditPlus로 /etc/nginx/sites-available/default 파일을 열기합니다.
server {
listen 443 ssl http2 default_server;
listen [::]:443 ssl http2 default_server;
server_name 도메인.com;
ssl_certificate /etc/letsencrypt/live/도메인.com/fullchain.pem;
ssl_certificate_key /etc/letsencrypt/live/도메인.com/privkey.pem;
ssl_trusted_certificate /etc/letsencrypt/live/도메인.com/fullchain.pem;
include /etc/nginx/snippets/ssl.conf;
root /var/www/html;
index index.php index.html index.htm index.nginx-debian.html;
location / {
try_files $uri $uri/ =404;
if (!-e $request_filename) {
rewrite ^.*$ /index.php last;
}
}
location ~ \.php$ {
include snippets/fastcgi-php.conf;
fastcgi_pass unix:/run/php/php7.4-fpm.sock;
fastcgi_param SCRIPT_FILENAME $document_root$fastcgi_script_name;
include fastcgi_params;
fastcgi_read_timeout 300;
}
location ~ /\.ht {
deny all;
}
}
# HTTPS www. server configuration
server {
listen 443 ssl http2;
listen [::]:443 ssl http2;
server_name www.도메인.com;
ssl_certificate /etc/letsencrypt/live/도메인.com/fullchain.pem;
ssl_certificate_key /etc/letsencrypt/live/도메인.com/privkey.pem;
ssl_trusted_certificate /etc/letsencrypt/live/도메인.com/fullchain.pem;
include /etc/nginx/snippets/ssl.conf;
location / {
return 301 https://도메인.com$request_uri;
}
}
# Default server configuration
server {
listen 80;
listen [::]:80 default_server;
server_name 도메인.com;
include /etc/nginx/snippets/letsencrypt.conf;
location / {
return 301 https://도메인.com$request_uri;
}
}
# HTTP - CNAME Connect www.도메인.com to 도메인.com
server {
listen 80;
listen [::]:80;
server_name www.도메인.com;
include /etc/nginx/snippets/letsencrypt.conf;
location / {
return 301 https://www.도메인.com$request_uri;
}
}
변화가 많습니다.
전체를 복사해서 덮어쓰기를 합니다.
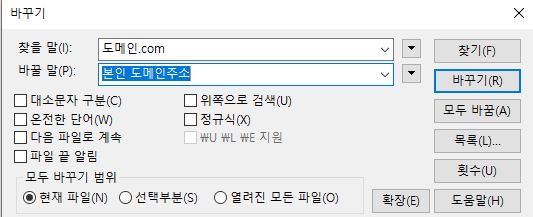
컨트롤+H 를 눌리고 찾을 말에는 도메인.com 바꿀 말에는 본인에 도메인 주소를 입력 후
바꾸기 버튼을 눌러 변경 후 저장합니다.
sudo service nginx restart
차례로 입력 후 본인에 도메인으로 접속해 보시면 HTTPS가 적용 된 것을 확인 할 수 있습니다.
5. SSL 인증서 자동갱신
root 권한으로 변경 합니다.
nano letsencrypt.sh
차례로 입력 합니다.
/etc/init.d/nginx stop
/usr/local/bin/certbot renew> /var/log/letsencrypt/le-renew.log
fuser -k 80/tcp
/etc/init.d/nginx start
nano 에디터에 붙여넣기 후 컨트롤+X 눌리고 Y 눌리고 ENTER를 눌려 저장합니다.
위 명령어를 입력 합니다.
위 명령어를 입력합니다.
1. /bin/nano <---- easiest
2. /usr/bin/vim.basic
3. /usr/bin/vim.tiny
4. /bin/ed
Choose 1-4 [1]: 1
1번 nano 에디터를 선택합니다.
제일 아래 위 명령어를 추가합니다.
일요일 새벽 4시 30분에 갱신을 하고 Nginx서버를 재시동 합니다.
#
# Each task to run has to be defined through a single line
# indicating with different fields when the task will be run
# and what command to run for the task
#
# To define the time you can provide concrete values for
# minute (m), hour (h), day of month (dom), month (mon),
# and day of week (dow) or use '*' in these fields (for 'any').#
# Notice that tasks will be started based on the cron's system
# daemon's notion of time and timezones.
#
# Output of the crontab jobs (including errors) is sent through
# email to the user the crontab file belongs to (unless redirected).
#
# For example, you can run a backup of all your user accounts
# at 5 a.m every week with:
# 0 5 * * 1 tar -zcf /var/backups/home.tgz /home/
#
# For more information see the manual pages of crontab(5) and cron(8)
#
# m h dom mon dow command
30 4 * * 0 letsencrypt.sh
에디터 창 내용은 이렇습니다.
컨트롤+X를 눌리고 Y를 눌리고 ENTER를 칩니다.
위 명령어를 입력 합니다.
위 명령어로 자동갱신 모의 테스트를 진행합니다.
- - - - - - - - - - - - - - - - - - - - - - - - - - - - - - - - - - - - - - - -
Processing /etc/letsencrypt/renewal/도메인.com.conf
- - - - - - - - - - - - - - - - - - - - - - - - - - - - - - - - - - - - - - - -
Cert not due for renewal, but simulating renewal for dry run
Plugins selected: Authenticator webroot, Installer None
Renewing an existing certificate
Performing the following challenges:
http-01 challenge for 도메인.com
http-01 challenge for www.도메인.com
Using the webroot path /var/www/letsencrypt for all unmatched domains.
Waiting for verification...
Cleaning up challenges
- - - - - - - - - - - - - - - - - - - - - - - - - - - - - - - - - - - - - - - -
new certificate deployed without reload, fullchain is
/etc/letsencrypt/live/도메인.com/fullchain.pem
- - - - - - - - - - - - - - - - - - - - - - - - - - - - - - - - - - - - - - - -
- - - - - - - - - - - - - - - - - - - - - - - - - - - - - - - - - - - - - - - -
** DRY RUN: simulating 'certbot renew' close to cert expiry
** (The test certificates below have not been saved.)
Congratulations, all renewals succeeded. The following certs have been renewed:
/etc/letsencrypt/live/도메인.com/fullchain.pem (success)
** DRY RUN: simulating 'certbot renew' close to cert expiry
** (The test certificates above have not been saved.)
- - - - - - - - - - - - - - - - - - - - - - - - - - - - - - - - - - - - - - - -
IMPORTANT NOTES:
- Your account credentials have been saved in your Certbot
configuration directory at /etc/letsencrypt. You should make a
secure backup of this folder now. This configuration directory will
also contain certificates and private keys obtained by Certbot so
making regular backups of this folder is ideal.
Congratulations 나오면 성공한겁니다.
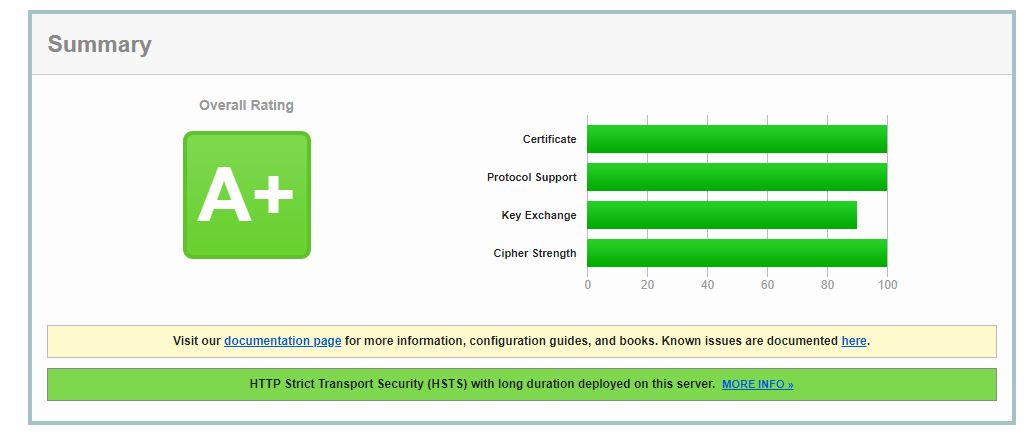
6. 보안 점수확인
아래 사이트에서 본인의 도메인 주소를 입력하면 보안점수를 알 수 있습니다.
SSL 인증서가 제대로 설치가 되었다면 A+ 등급이 나옵니다.